BLOG
|
 I regularly meet photographers, both enthusiast and professional who don’t rename their photographs on a regular basis. By this I mean more accurately they that don’t rename the image files on the computer. This is a terrible idea if you create images and intend to work on them in any meaningful way through post-production, or if you want to do more than shoot pure for social media (and even then it’s better to rename the files). The usual excuse is that it is just too much work and hassle to rename the files. It really doesn’t have to be though.
0 Comments
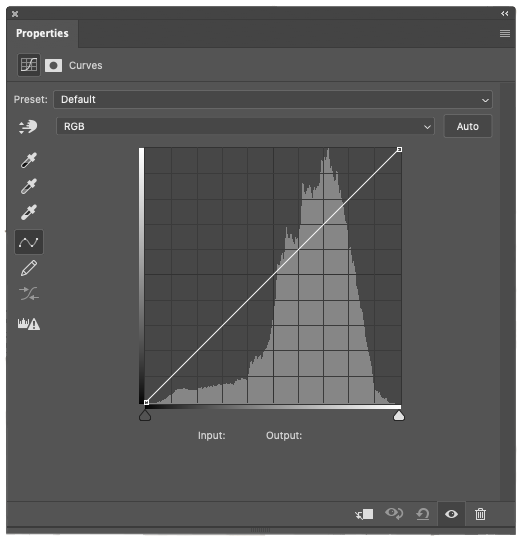 If there is one tool that every digital photographer should know and understand (at least a little) it is the curves dialogue. Concurrently the most asked question I receive when teaching anything to do with post-production is, “what is the curves tool and how do I use it?” To try and simplify this then, here is a very quick and dirty explanation of the curves dialogue that will hopefully clear a path through the murk that is post-production.
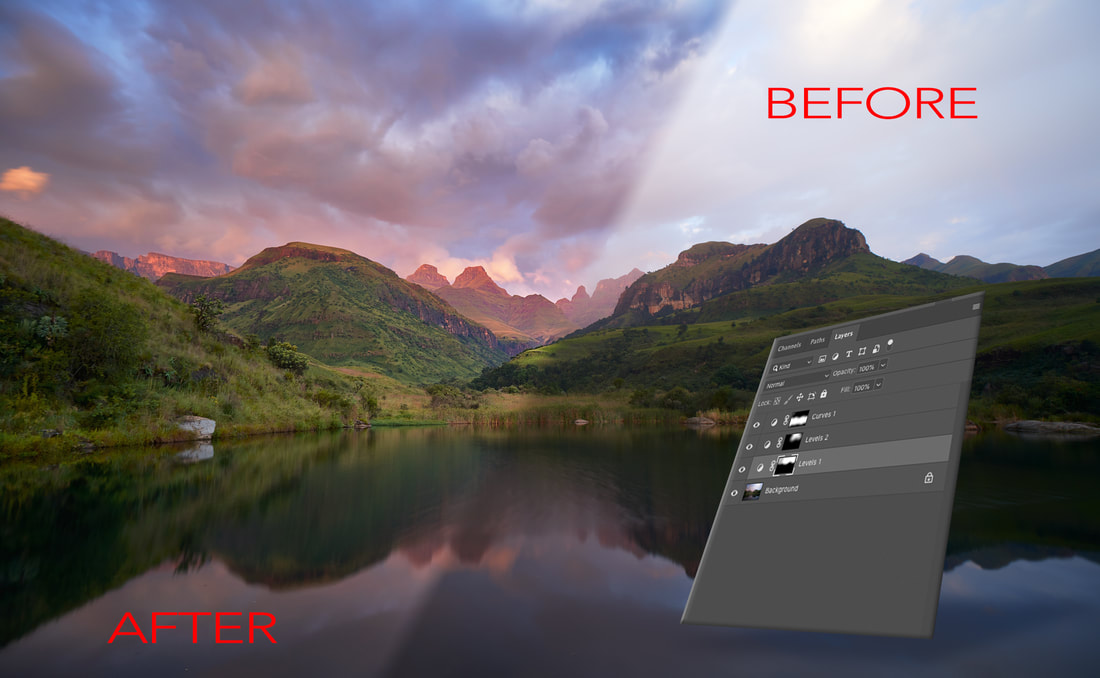 Editing in layers is a principle concept for being able to work in Photoshop. In this post we'll take a look at very basic masking techniques to start down the road of layered editing in Photoshop, or any other bitmap editor for that matter.
 When you are in a programme like Lightroom or Capture One, the use of presets becomes a quick and easy - as well as fast - way to make changes to images. Rather than changing every setting individually, a photographer can select a preset that they have created, or even bought, to reset several parameters to one or several images at a time. To say that saves time is an understatement. Taking all the time required to individually adjust images, the use of presets can literally save hours out of a week of editing.
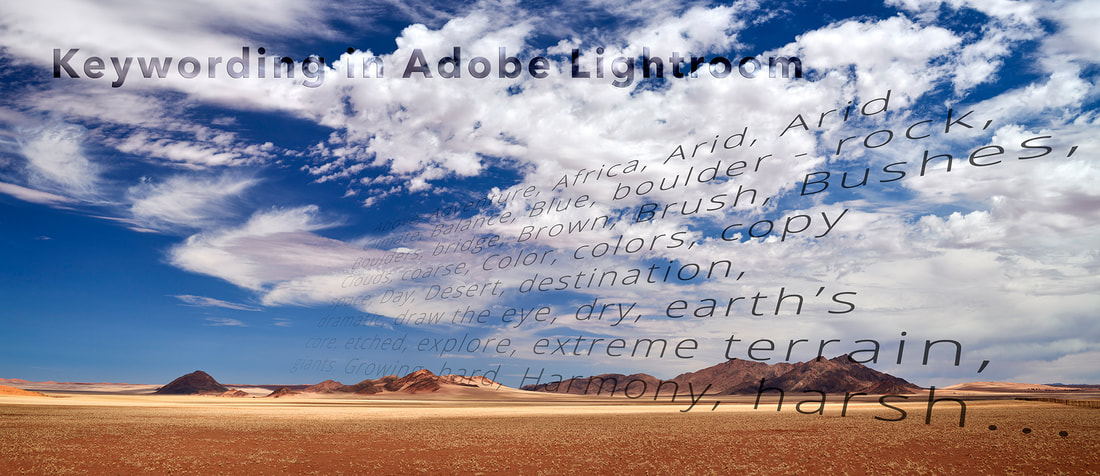 Lightroom has a killer feature that seems to often get overlooked by people who use it - Keywording. Maybe it’s because keywording is the least sexy part of the image pipeline. Yet it is an extraordinarily important part of every photographer’s workflow, and one that is not given nearly enough attention as it should. Keywords are by far the best way to find photographs when you have a large number of images that need to be sorted through. Lightroom continues to be one of the easiest ways to add keywords to an image, and one of the fastest ways to fin an image in a vast library, so long as you have actually keyword the images in the first place.
 Nik, as an application, has been around since 2000 when it was was first incorporated into Nikon’s RAW software called Capture NX2. What made the software special was something called U-point technology. In a rather trite naming convention, it is supposed to refer to the fact that '‘you point somewhere, and it works'’. Yet, this is pretty much how U-point does work. Nils Kokemohr (founder and CTO of Nik Software), managed to create an application that looks at luminosity, colour and tone as a way of selecting an area for image editing. To this day, it is one of the most intuitive and effective ways to select localised areas in an image for colour editing. At any rate, Nik’s intellectual property has passed through several hands from Nikon, to their own, to Google and thence to DxO. In a nutshell, the selection tool that was first introduced in 2000 is still going strong, yet there are photographers who still aren’t aware of it’s power and how to use it effectively.
 One of the headline features when Capture One Pro 12 (C1 announced earlier this year the ability to create luminosity masks and apply adjustments in a layered fashion to an image). This is a fantastic addition that means there is one reason less (potentially) to dive into Photoshop. It isn’t quite as accurate as working with luminosity masks and layers in Photoshop itself, but it is close enough that for many photographers it can negate the need for the fully fledged bitmap editor (PS).
|
Nature's Light
|
 RSS Feed
Services |
Company |
|