BLOG
|
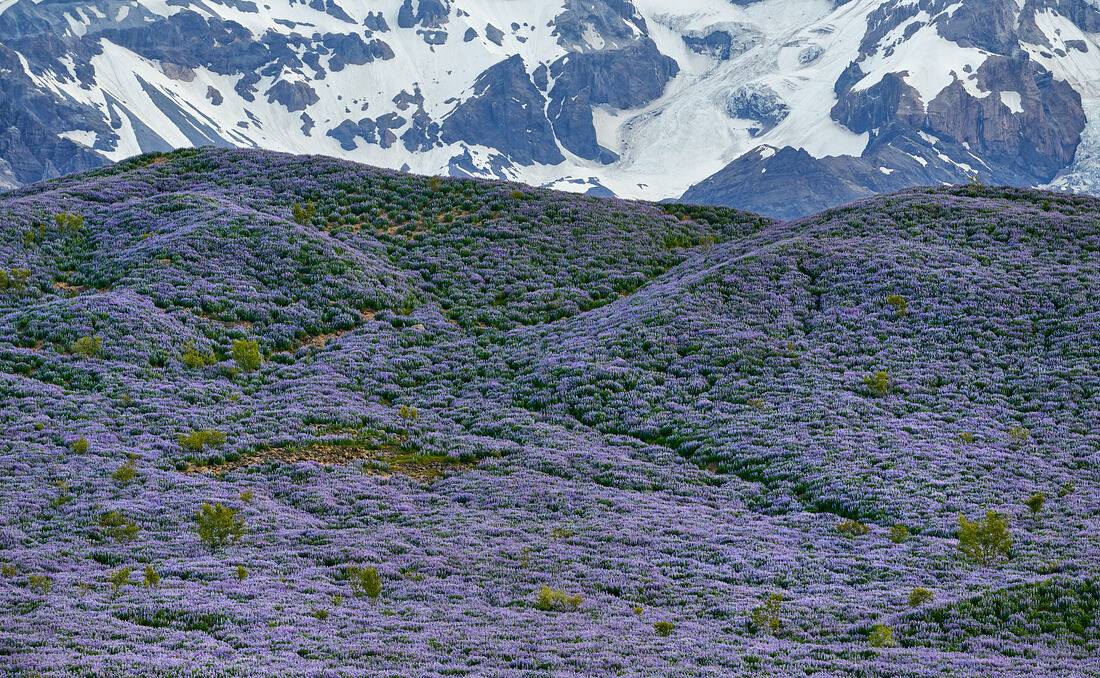 Nik, as an application, has been around since 2000 when it was was first incorporated into Nikon’s RAW software called Capture NX2. What made the software special was something called U-point technology. In a rather trite naming convention, it is supposed to refer to the fact that '‘you point somewhere, and it works'’. Yet, this is pretty much how U-point does work. Nils Kokemohr (founder and CTO of Nik Software), managed to create an application that looks at luminosity, colour and tone as a way of selecting an area for image editing. To this day, it is one of the most intuitive and effective ways to select localised areas in an image for colour editing. At any rate, Nik’s intellectual property has passed through several hands from Nikon, to their own, to Google and thence to DxO. In a nutshell, the selection tool that was first introduced in 2000 is still going strong, yet there are photographers who still aren’t aware of it’s power and how to use it effectively. I am going to look at just one app that comes with the Nik Efex suite that is in it’s second DxO iteration as of June this year (2019) – (you can read about whether the upgrade is necessary on this page); Nik Color Efex 4. 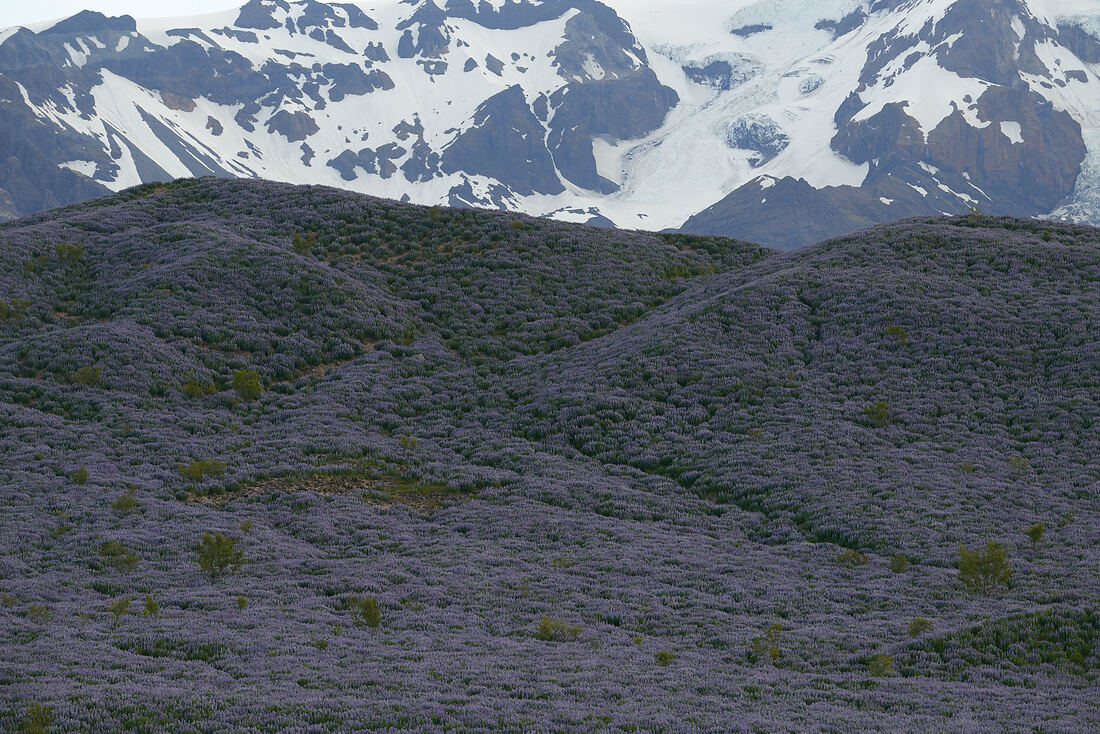 The original unedited image of the lupin flowers. the light was rather flat, but it was still a worthwhile scene to photograph Workflow with an image To start with I try to look at the image I am wanting to edit and decide what aspects of the image need to be adjusted. It’s fine working by feel as you go, but I personally find that the best results come from planning the workflow ahead in much the same way that we used to work in the darkroom from a contact print and then a working print of instructions. I try to do this regardless of the software I’m likely to use. It just needs an overall idea from which to approach the image. In this case I would like to lift the tonal values of the field of lupine flowers, while bringing in contrast and detail to the mountains behind. The RAW file itself came out rather flat, whereas my experience of the green saplings poking though the lupines was they felt more luminously green, so I also want to lighten the green leaves of these trees.  In order to demonstrate the effectiveness of Nik Color Efex (in particular) I open the file directly from Capture One Pro - without doing any edits - into Nik Color Efex 4. The first step is to lighten the lupine field while retaining the tonal value of the rear mountains. Using the Tone Curve I brought up the tonal values around the lupine flowers. This also affects the mountain though, so I need to select just the flowers. 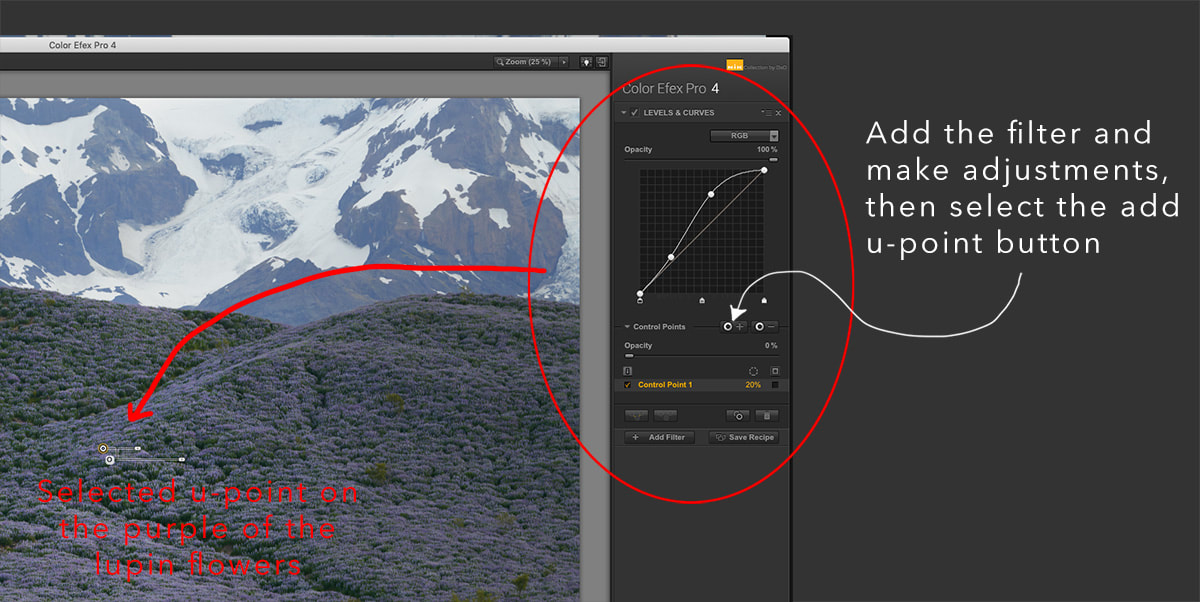 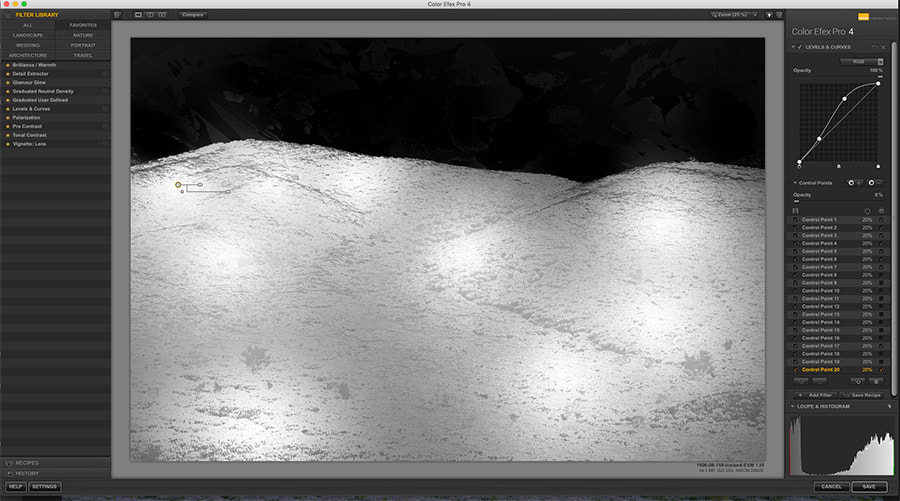 The final mask for the first filter so that only the field of lupine flowers is selected
 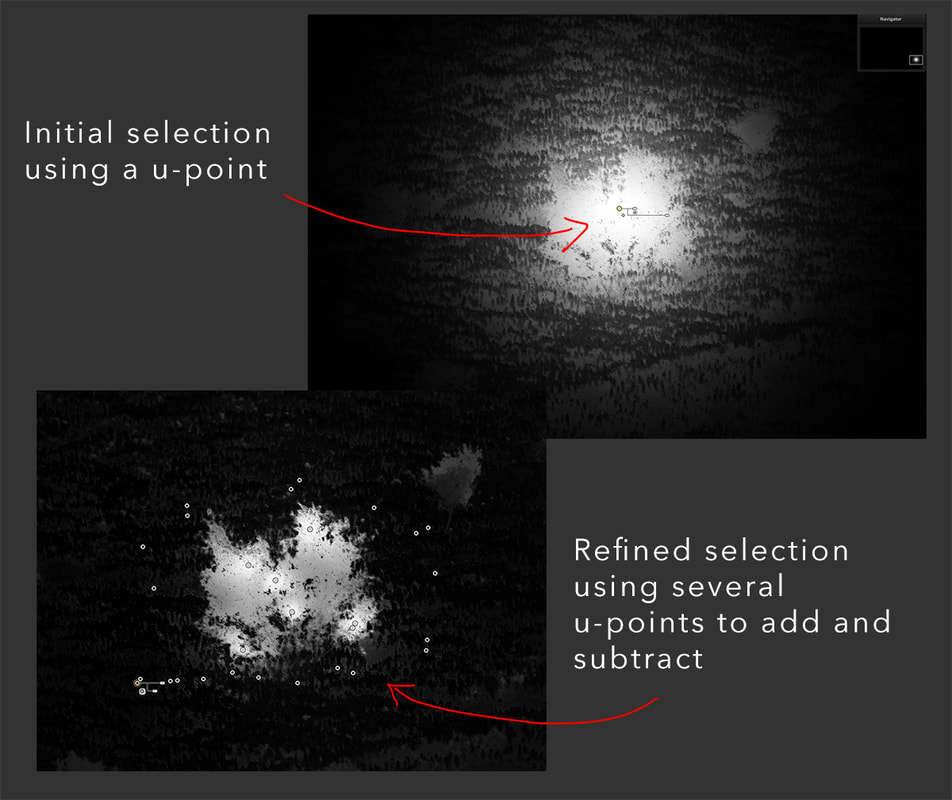 For the initial tone curve bump to the lupine field I used several u-points (additive and subtractive) so as to essentially exclude the mountains from the mask. The second Layers and Curves filter was then applied in much the same way to the mountains, while the third was more specific to the green sapling that I wanted to brighten slightly. 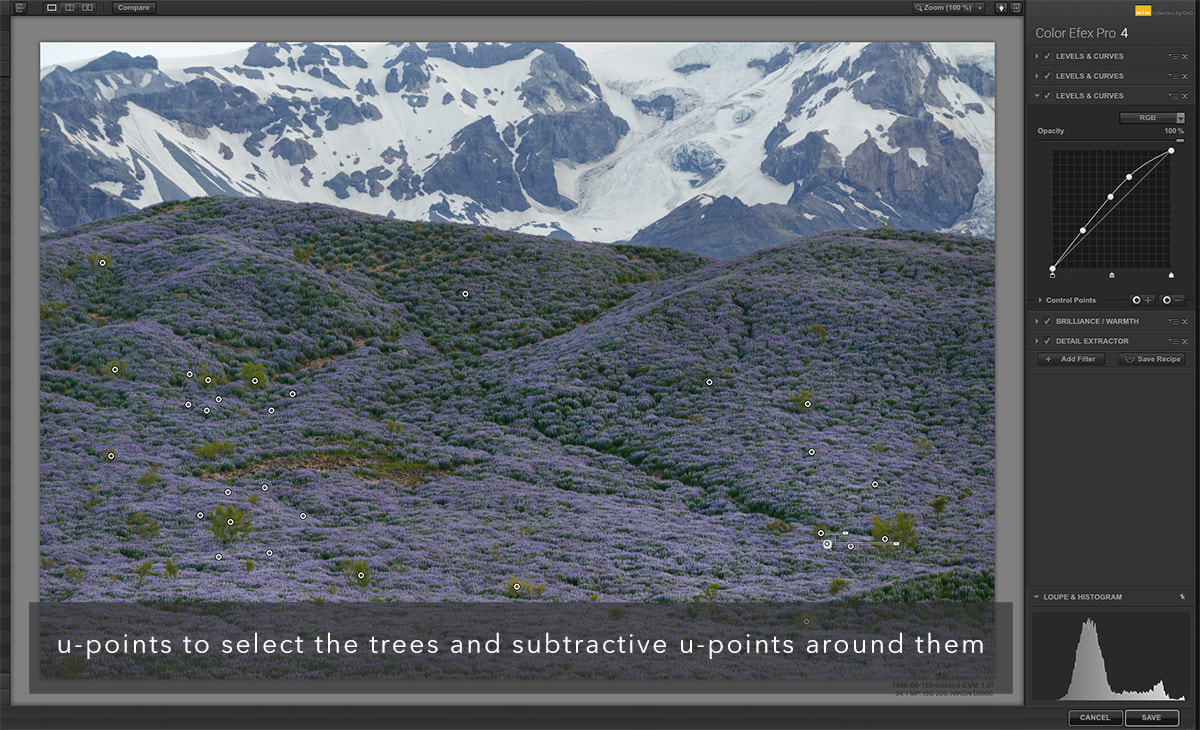 After the trees were lightened slightly I added another Detail Extractor filter. This was used to select the mountain range in particular and bring out the texture of the rock face. Again, the u-points allowed selection of just the mountain face. 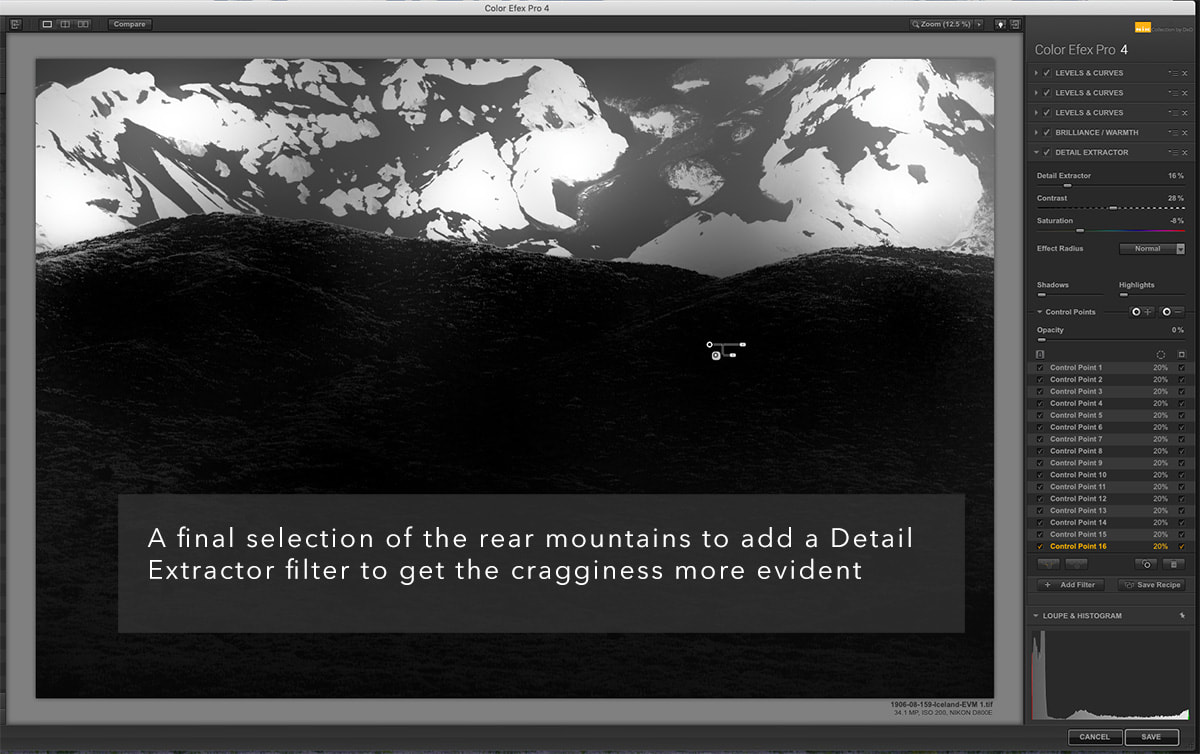 A final filter was to add a last touch of the Pro Contrast filter before saving the image. If you are working our of Photoshop using Nik Efex as a plugin, the image pops back into Photoshop as a new layer (meaning further masking is possible). This is my preferred way of working with Nik filters, but it is also possible to simply round-trip between your usual RAW editor (in my case Capture One Pro) and Nik Efex (or any of the other filters.
Conclusion The Nik Efex suite has gone through several iterations and there is definite competition in the likes of On One and Luminar software. For ease of use, functionality and the u-point selection tool itself, the Nik Efex filters are still a go-to tool for my work. Admittedly I don't usually work the entire image in Nik, choosing rather to work on an image in Photoshop or Capture One and then finishing it off in Nik. There's a lot of bumpf in the filters that get offered in the various apps as well. As it is, Nik Color Efex 4 which is to me a fantastic finishing tool can essentially be stripped down to around 10 filters. The rest are for the heavy filter users (think weird colours on Instagram). But the suite also includes fanastic apps like Siver Efex Pro which also uses u-point technology. Finally, for someone starting out in post-production, the u-points available in Nik Efex (and now DxO PhotoLab) make selections intuitive and simple. Yes, ultimately photographers will find careful use of luminosity masking more accurate, but significantly more difficult to grasp, let alone master. Until that becomes an option on the learning path though, u-points get the photographer 99% of the way there.
0 Comments
Leave a Reply. |
Nature's Light
|
 RSS Feed
Services |
Company |
|