BLOG
|
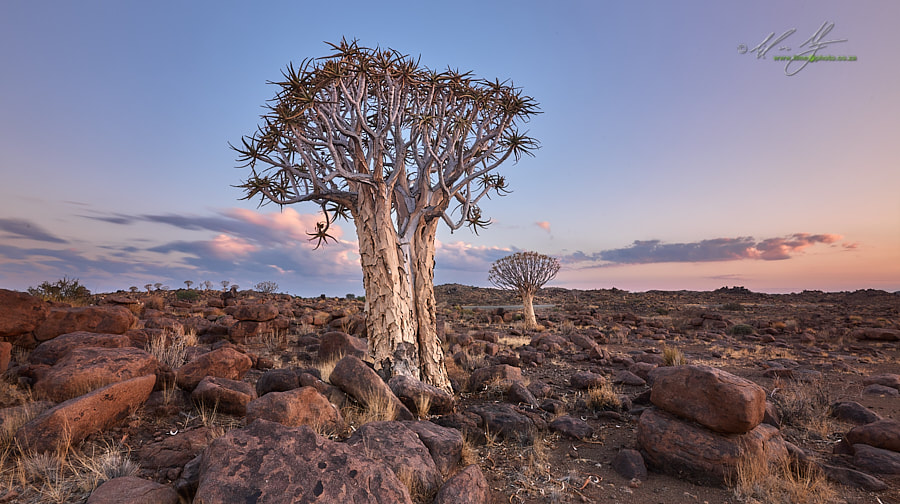 One of the headline features when Capture One Pro 12 (C1 announced earlier this year the ability to create luminosity masks and apply adjustments in a layered fashion to an image). This is a fantastic addition that means there is one reason less (potentially) to dive into Photoshop. It isn’t quite as accurate as working with luminosity masks and layers in Photoshop itself, but it is close enough that for many photographers it can negate the need for the fully fledged bitmap editor (PS). Step 1: To create a luminosity mask in the current version of C1, first create a new filled mask. To keep track of the different layers it is useful to name them, so in this case I have named the layer ‘tree’. The idea is to separate the boughs of the quiver tree so that they can be independently edited and lightened in relation to the sky. 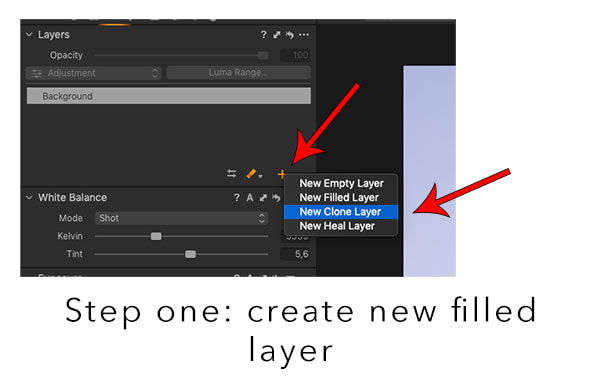 Step 2: Once the layer has been created make the edits in the development panels of C1. In this case I have brightened exposure, increased contrast and saturation and also lifted the shadows a little. Overall the image is too bright, but I’ll only be targeting the boughs through the luminosity mask. 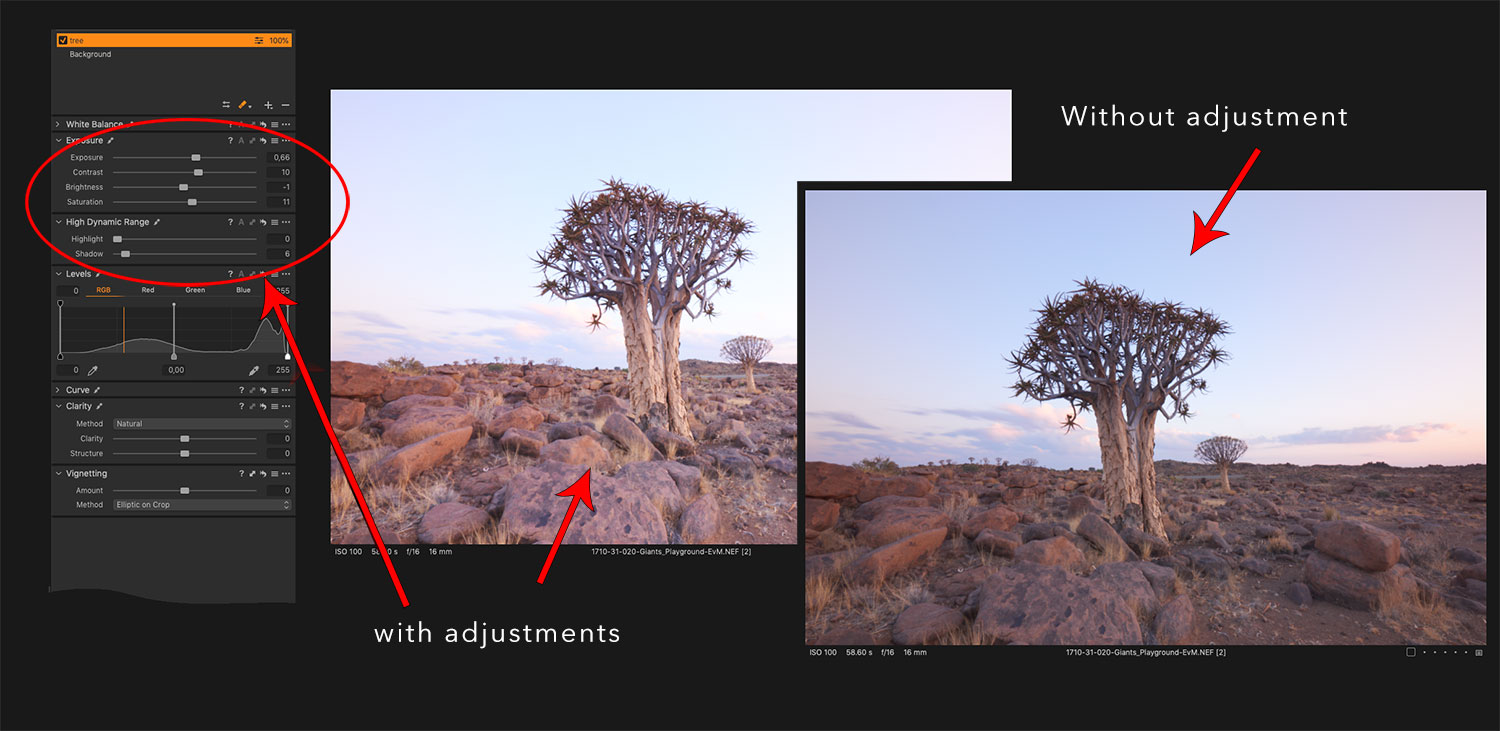 Step 3: Click the ‘luma mask’ button at the top right of the layers palette. This brings up a small dialogue box on the screen. 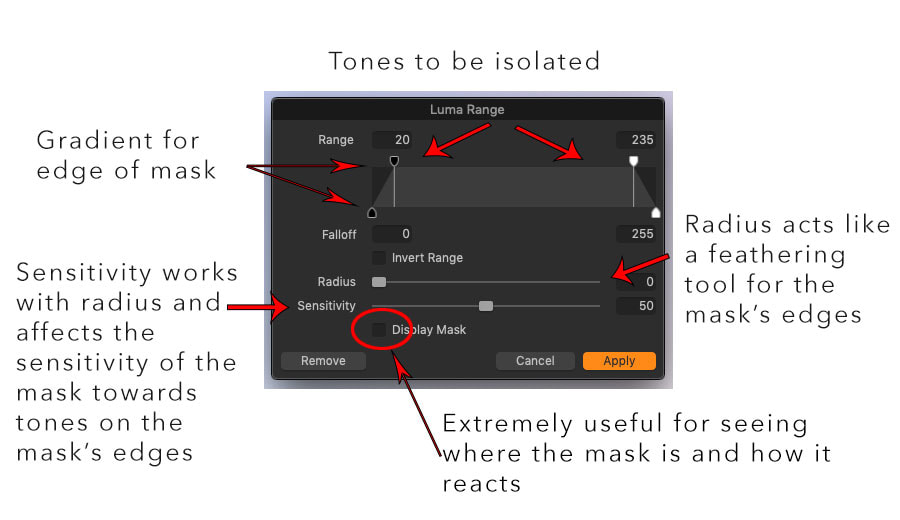 Essentially what you have is a range selector that selects the luminance values between pure black on the left hand side and pure white on the right. You can manipulate the triangle nubs or sliders to vary and graduate the range selections. There are then radius and sensitivity sliders that essentially feather the selection to the edges of your luminance objects. 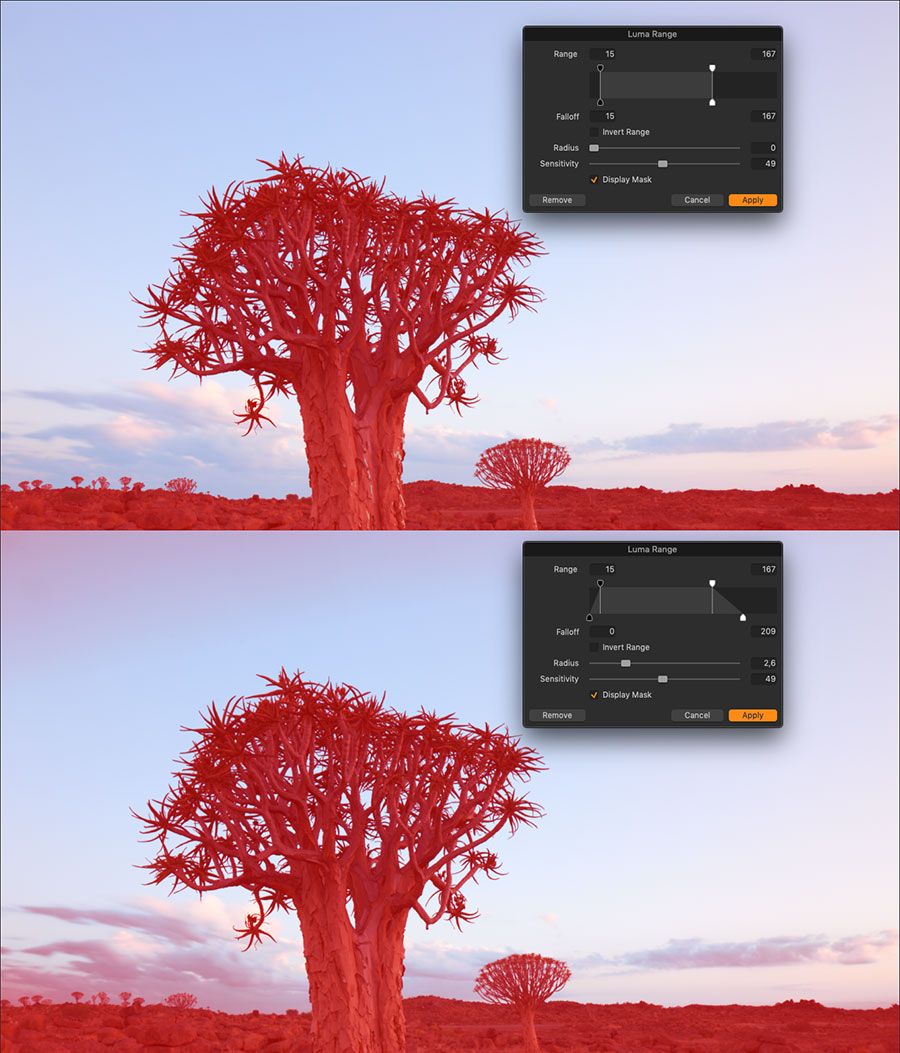 In the above example, with the 'Display Mask' switched on (to show a red mask where the selection will take place), you can see the difference between a sharp transition (upper image) and one where there has been a gradient of tones selected (lower image). In this example I actually want the upper image in order to create a mask to select just the boughs of the quiver tree. I will then use the Radius and Sensitivity sliders to refine those edges so that haloing doesn't occur. In the below image you can see the edge detail where there are halo artifacts that can be removed by sliding the radius slider to the right. I think of the radius as a fine feathering tools and the sensitivity as a kind of reverse clarity on the mask itself. 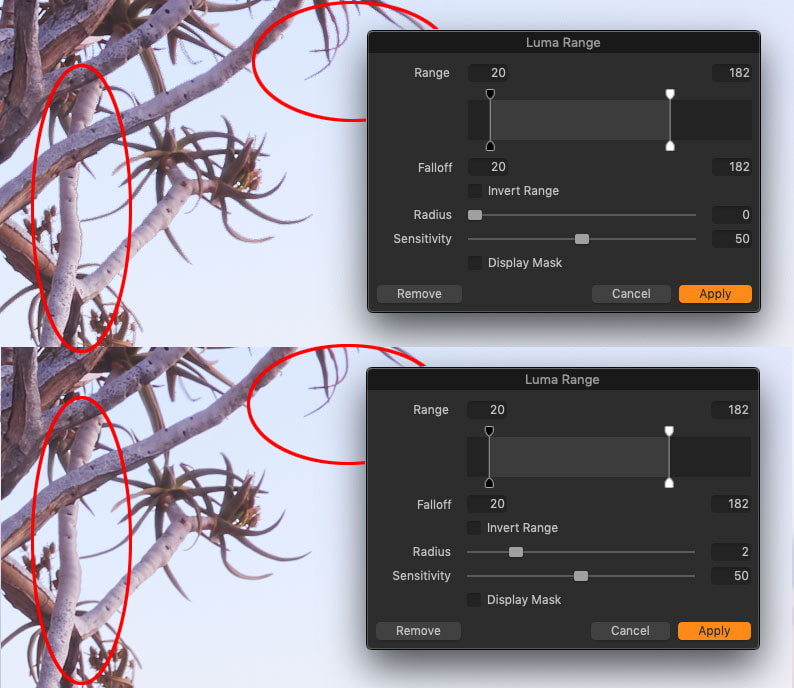 If you want to further refine the luminosity mask, rastify the mask by clicking open the mask menu tab and and selecting 'rastify'. You can then use a conventional brush or eraser tool to add or subtract from the mask itself. To complete the image in question I added a few more layers (see masks below). The first step was to create the mask for the trees (top left). I refined the luminosity mask by rastifying and then using the eraser tool to subtract the selection amongst the rocks and the edge of the trunk. This layer was used to lighten and add contrast to the trees (I also bumped up the white balance slightly to make the tree a smidgen warmer). The next layer (bottom left) was again a luminosity mask, but this time selecting for the sky which was darkened and saturated. The third layer was an overall contrast boost for the entire layer (top right), hence the solid red colour indicating a full mask. The last layer was then a clarity boost painted in with a brush for the foreground rocks. 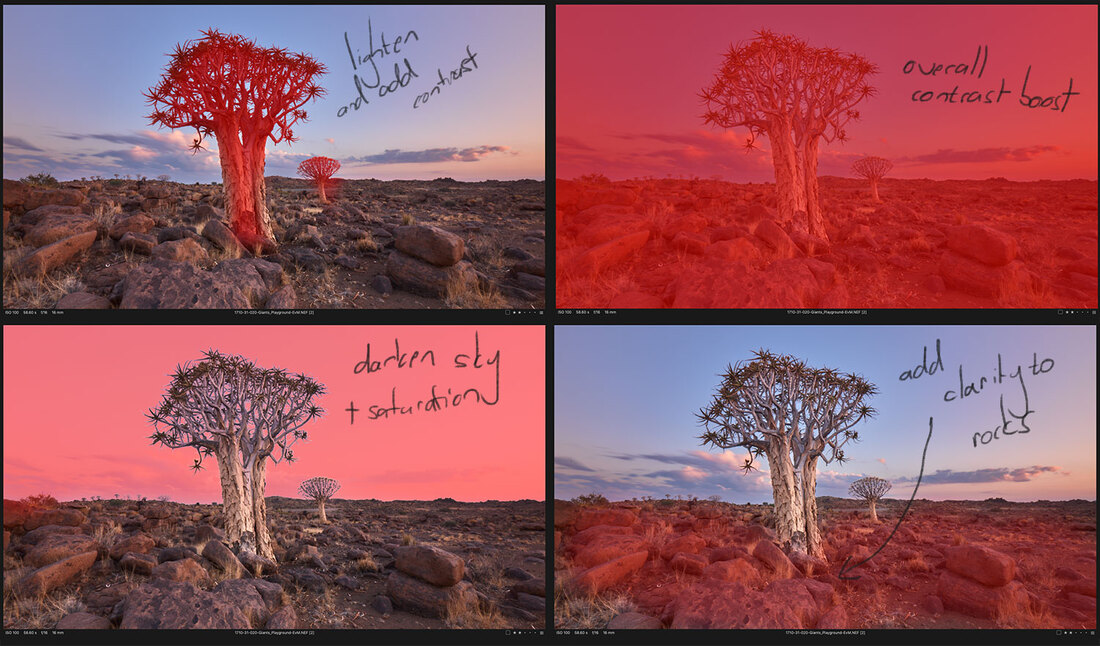 A did a final finishing polish to the image in Nix Color Efex using the Pro Contast option. I often finish off images with this simply to see whether I have had any major colour shifts in the image, as well as to potentially play the dynamic contrast. In this case though, all I did was shift the colour hue ever so slightly away from the magenta that was a little too obvious. If you are a regular user of luminosity masks in Photoshop, you might still find the tools in C1 to be a little simplistic. However, if you are only just starting out on using luminosity values to create masks, or are keen to avoid using full-blown Photoshop, then the luminosity selections in C1 are a fantastic addition. As it is I have found that some images that need just a little tweaking can now stay firmly in my C1 workflow, rather than round-tripping into Photoshop, and that saves an incredible amount of time. 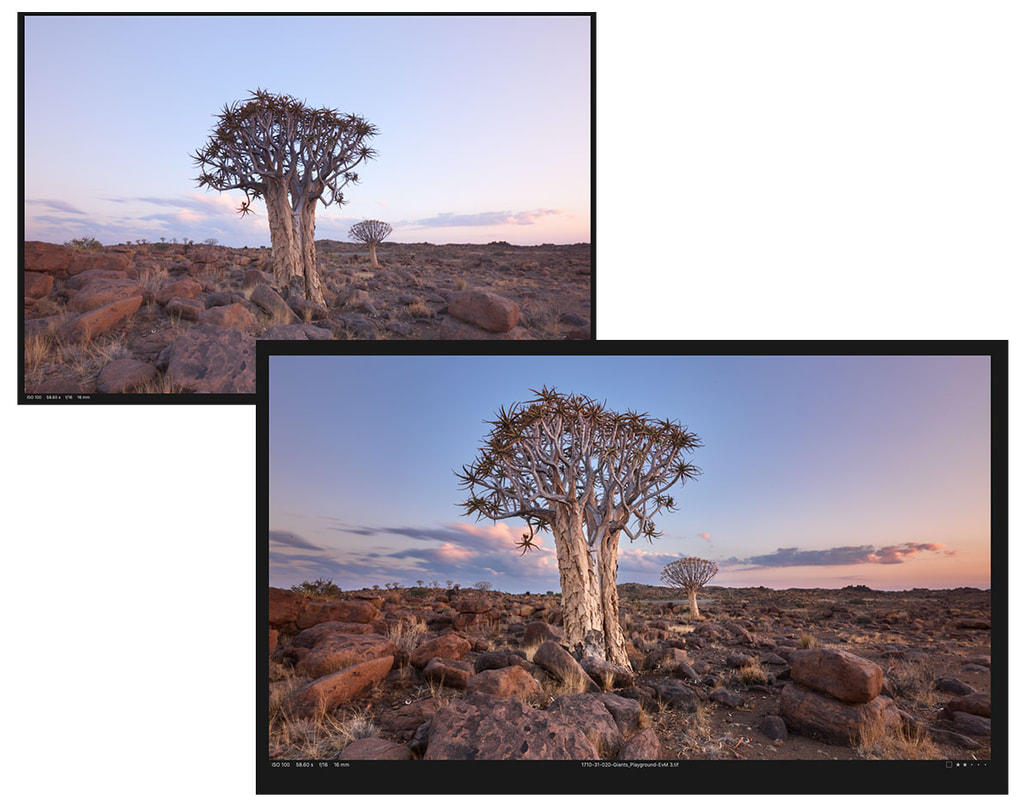
0 Comments
Leave a Reply. |
Nature's Light
|
 RSS Feed
Services |
Company |
|