BLOG
|
- Home
- Photography Courses
-
Photography Tours & Workshops
- South Africa >
-
Africa Workshops
>
- Uganda Private Wildlife Photography workshop
- Morocco - Meandering Morocco - 10 Nights
- Botswana - Photographing Giants - Botswana 5 night astrophotography workshop
- Lesotho - Expoloring The Mountain Kingdom - 6 night Landscape Workshop
- Namibia - Namibia's North - 13 Nights
- Namibia - Composing the Dunes - 14 Days
- Madagascar - Exploring the Island Continent - 15 Days
- Europe & the North >
- The 'Where To Next' Survey
- About Us
-
Gear Sales
- Leofoto
- Leofoto Flagship Tripods
- Leofoto Accessories
- Leofoto Mini Tripod & Smartphone
- Leofoto Monopods
- Leofoto Quick Release Plates
- Leofoto Ranger Tripods
- Leofoto Leveling Ranger Tripods
- Leofoto SOAR/PRS
- Leofoto Summit Tripods
- Leofoto Tripod Heads
- NiSi
- NiSi 100mm
- NiSi 150mm
- NiSi M75
- NiSi SWIFT Filter system
- NiSi Circular Filters
- NiSi Close Up Lens Kit NC 77mm
- NiSi Drone Filters
- F-Stop Questionnaire
- Blog
- NiSi SWIFT Filters
|
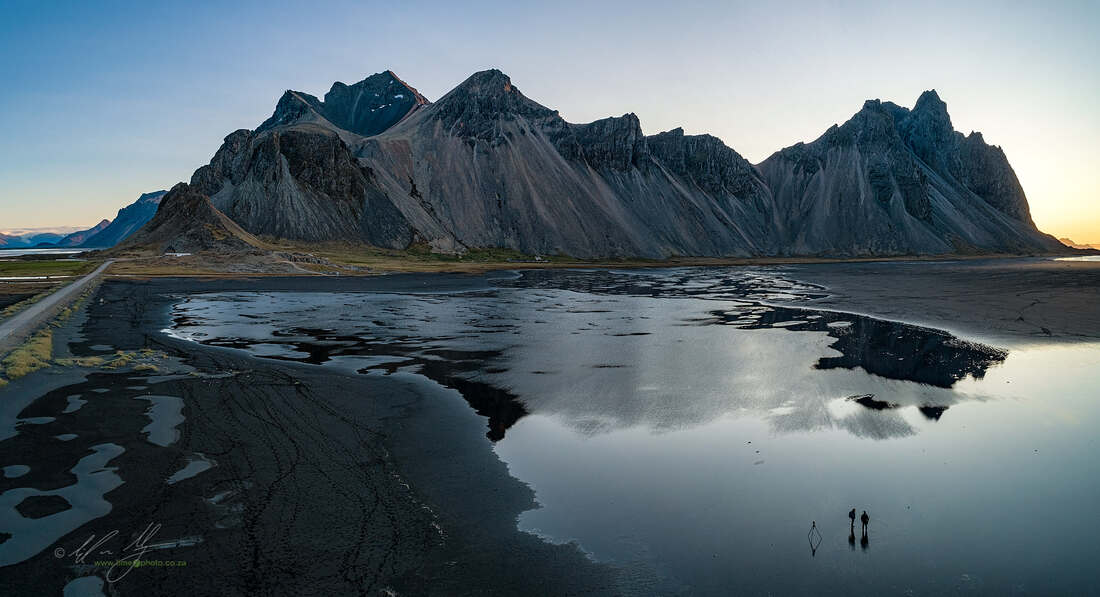
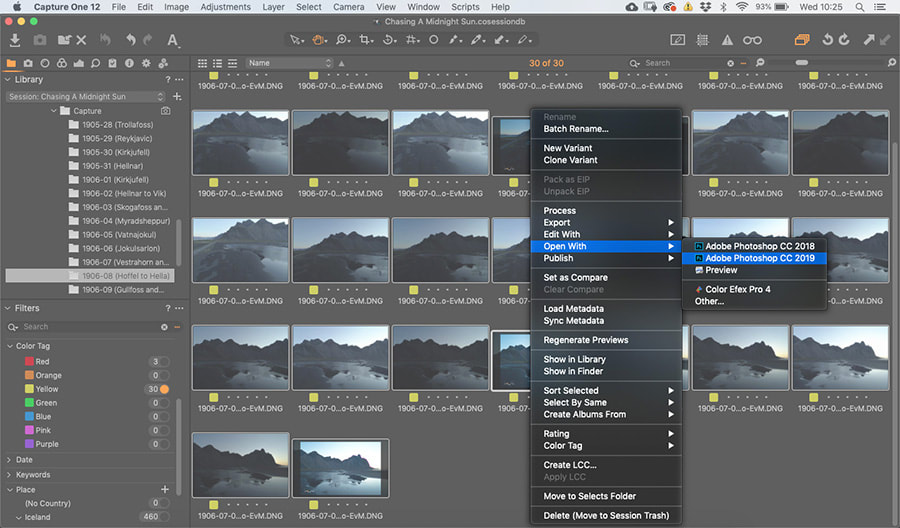
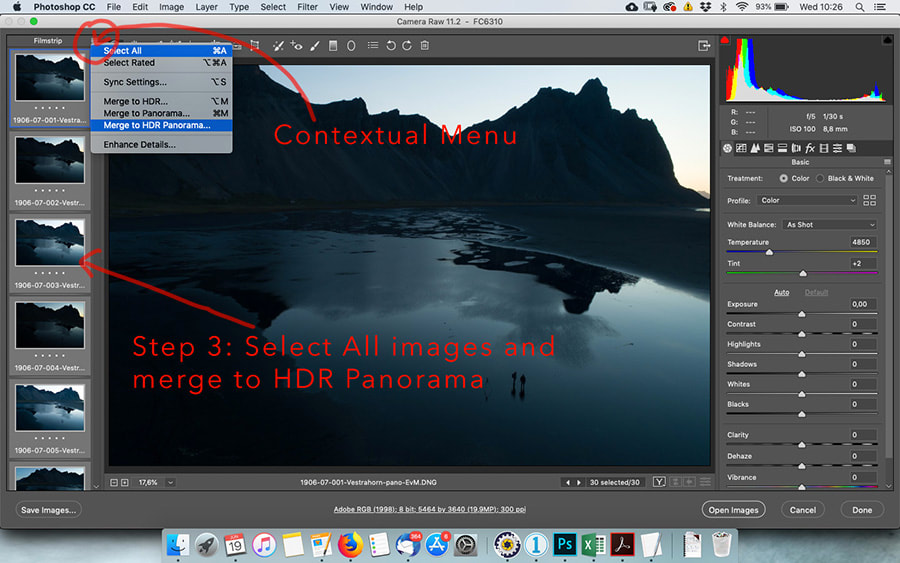
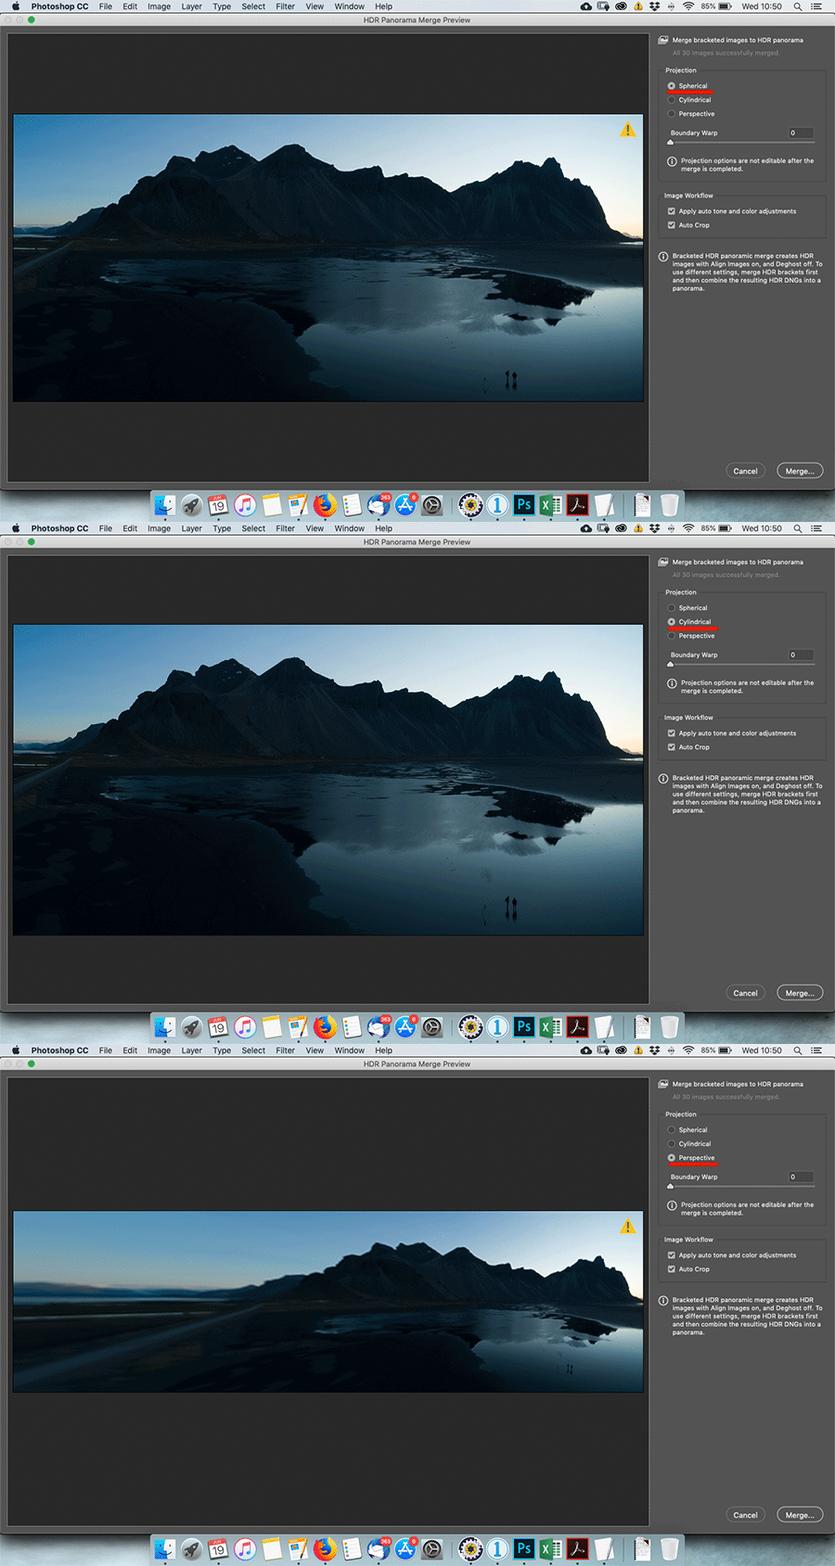
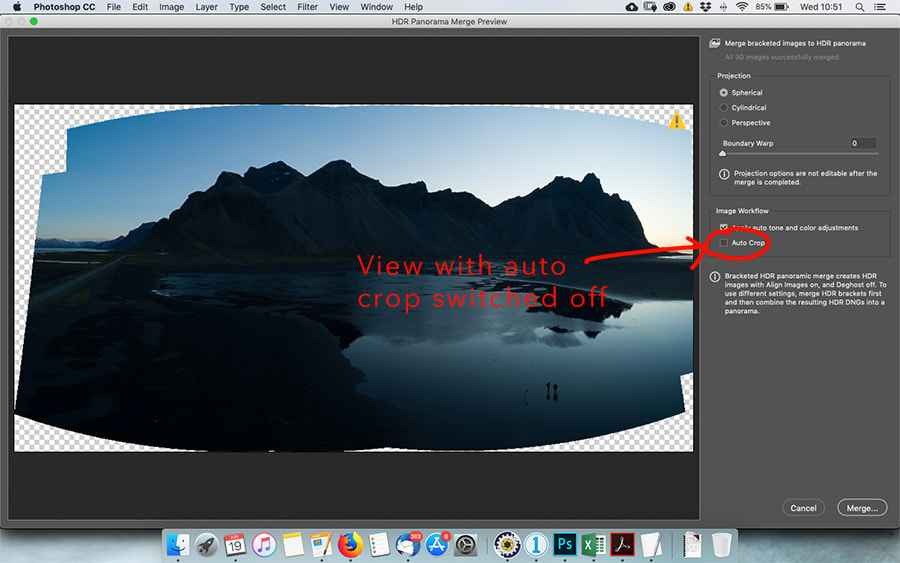
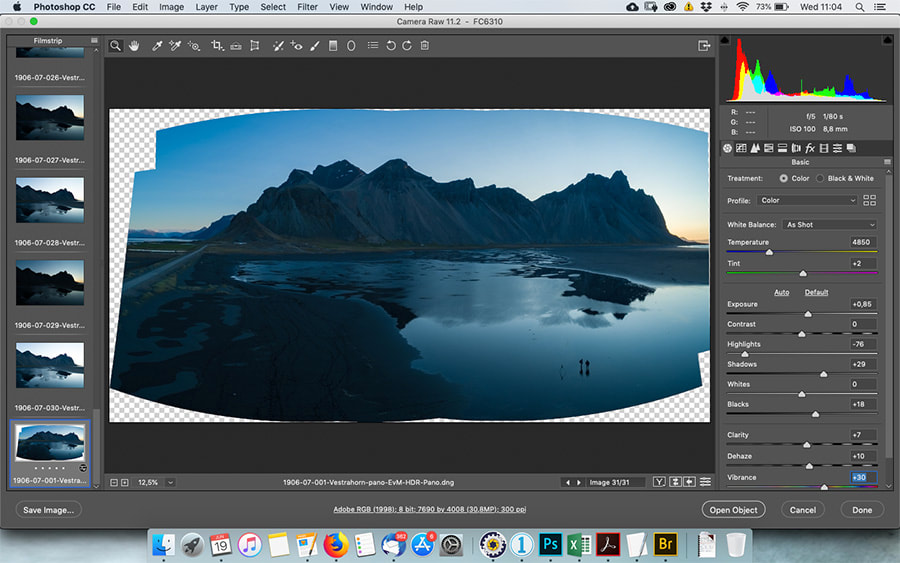
I am admittedly stubborn when it comes to post-production. Although I am a firm advocate of continuously learning new techniques, I do tend to be late on the uptake. As is the case with Adobe’s Merge to HDR pano feature in the latest version of Camera RAW (version 11.3). For a long time I have had a tedious, but effective, workflow creating HDR panoramic both for my own images, as well as for clients. The technique has involved layering images and selectively blending them into individual frames which are then stitched together to form a panoramic. The technique was long-winded, difficult to learn, easy to mess up, but extremely effective. Then Adobe gives everyone the ability to do it at the click of a button. It seems almost like cheating it’s so easy. Here is the new process in a few easy steps: Step 1: Shoot the series of panoramic images with the HDR pano in mind. Make sure the camera is set to manual mode and then put it into auto exposure bracketing. For Canon you can set AE bracketing to 3 exposures with as wide a range between the exposures as you like. I suggest about 2 stops. For Nikon you can set the range and the number of bracketed images up to 7 images with up to 3 stops apart. A neat trick for Nikon cameras is to set the camera to self-timer mode, and then set the number of frames to the number of bracketed images (you do this in the self-timer men). The reason the camera is set to manual mode is so that as you rotate the camera for the panoramic, the series of exposures are all identical. If you use aperture priority there is the possibility of a shift in the shutter speed, meaning that the stitch won’t work anymore. Step 2: Once you have all your image ingested into a computer you can open them in Adobe Camera RAW by selecting the images and clicking ‘Open In>Photoshop CC 2019’ (although make sure that Camera RAW has been updated to the latest software). If you are using Adobe Bridge you can simply select the images and then hit the Occasionally Adobe CC has trouble updating. The Adobe software on my laptop updated by itself perfectly, but for some reason the Camera RAW plugin didn’t update on my desktop Mac Pro. If this happens to you, you might have to manually update the plugin. This is fairly easy though. Simply go to https://helpx.adobe.com/camera-raw/kb/camera-raw-plug-in-installer.html and follow the download link and instructions. Step 3: With all of the images loaded into the Camera RAW plugin, select all of them by either hitting Cmd+A or going to the contextual menu and choosing ‘Select All’. With all the images selected, right-click on an image and select ‘Merge to HDR Pano’ (you can also do this by again going to the contextual menu). Step 4: The images should take a little while to load and merge, but eventually a dialogue box will appear over the Camera RAW plugin, which will have a merged image. Importantly, you can select how the panoramic composite is warped, with options for Spherical, Cylindrical and Perspective. A slider beneath these options further tweaks the way the image is transformed to its frame (sometimes almost magically). Spherical - assumes as if the images were projected onto the outside of a sphere. This works well with multi-row wide panoramas Cylindrical - acts as if the image would be projected onto the inside of a cylinder. This is useful for very wide (usually single row) panoramas Perspective - projected as if mapped onto flat surface while keeping flat lines straight. It is supposed to be useful for architectural imagery, but the distortion for wide panoramas is often extreme. It is more useful for composite images using a longer lens than wide-angle images of a panoramic scene. Step 5: Once the projection has been selected and you hit ‘Merge’, the image comes up as a .DNG Raw file in Adobe Camera RAW. You then treat the image exactly as you would any other RAW file in the converter. The only difference is that thanks to the HDR nature of the file, there is an extraordinary amount of detail in the highlights and the shadows of the image. When you are ready you can hit ‘Open Image’, and the photograph opens up in Photoshop proper for any additional or finishing post-production. That’s it! It’s really as simple as selecting the images, opening them into Camera RAW and clicking a button. To say that I was gobsmacked when I first saw this is an understatement (thank you Nick and Angela). Yes, there is a possibility that my old time-intensive workflow might result in marginally better images in terms of dynamic range, but quite frankly I can mitigate against any undesired effects produced by the Adobe merge to HDR pano function in post. The feature has literally given me back hours of time. The downside of course is that it is so easy that we are likely to see a plethora of HDR panoramic images hit the internet in the next few months until they become boring. For me the goal will still be to produce natural looking images as opposed to the obviously high dynamic range images that bear no semblance to the real. I hate Adobe for its rental software and wayward attitude to its users, but credit where credit is due. Thank you Adobe!
3 Comments
1/14/2022 12:22:34
Reply
3/16/2022 15:45:09
Excellent article! Your post is essential today. Thanks for sharing, by the way.
Reply
Leave a Reply. |
Nature's Light
|
Services |
Company |
|
- Home
- Photography Courses
-
Photography Tours & Workshops
- South Africa >
-
Africa Workshops
>
- Uganda Private Wildlife Photography workshop
- Morocco - Meandering Morocco - 10 Nights
- Botswana - Photographing Giants - Botswana 5 night astrophotography workshop
- Lesotho - Expoloring The Mountain Kingdom - 6 night Landscape Workshop
- Namibia - Namibia's North - 13 Nights
- Namibia - Composing the Dunes - 14 Days
- Madagascar - Exploring the Island Continent - 15 Days
- Europe & the North >
- The 'Where To Next' Survey
- About Us
-
Gear Sales
- Leofoto
- Leofoto Flagship Tripods
- Leofoto Accessories
- Leofoto Mini Tripod & Smartphone
- Leofoto Monopods
- Leofoto Quick Release Plates
- Leofoto Ranger Tripods
- Leofoto Leveling Ranger Tripods
- Leofoto SOAR/PRS
- Leofoto Summit Tripods
- Leofoto Tripod Heads
- NiSi
- NiSi 100mm
- NiSi 150mm
- NiSi M75
- NiSi SWIFT Filter system
- NiSi Circular Filters
- NiSi Close Up Lens Kit NC 77mm
- NiSi Drone Filters
- F-Stop Questionnaire
- Blog
- NiSi SWIFT Filters

 RSS Feed
