BLOG
|
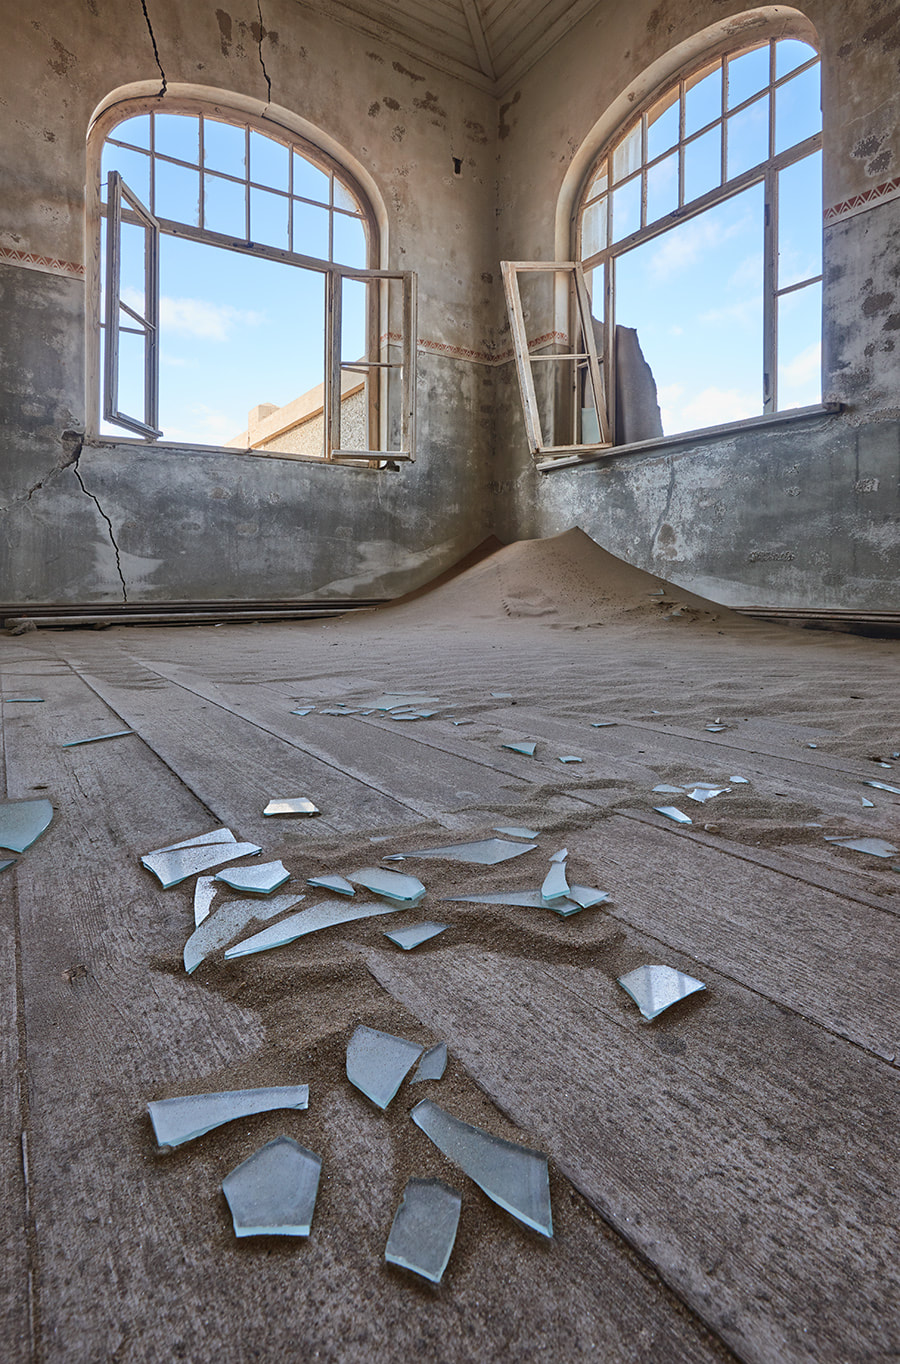 Depth of field in an image can sometimes be quite tricky to get right. Some images need an area to be in focus that is beyond the physical capabilities of the lens in use. Stopping down the aperture to achieve a greater depth of field comes at the significant cost of sharpness. Due to diffraction limitation, the sharpness of an image declines as you stop down past a certain point (around f8 in most lenses). With some images, even using a small aperture like f22 still doesn’t get the required amount of depth of field (this is particularly the case in close-up photography). In the past it was possible to achieve this extended depth of field using a Tilt/Shift lens taking advantage of something called the Scheimflug effect (basically tilting the lens so that the focus plane can effectively be extended). However, Tilt/Shift lenses are expensive, complicated and slow to use, and to top it off, are heavy. Thankfully digital photography allows us to achieve massive depth of field through something called ‘focus stacking’. The principle behind focus stacking is fairly simple. Photograph a scene or an object multiple times with each frame shot at a different focus point while all other settings remain the same. The images are then layered in software and blended together so that the sharp details in each layered frame are shown and the out of focus details from the images are masked out. The simplest way to do this is to use dedicated software, but this can be expensive. The good news is that if you have Photoshop, focus stacking is one of the automatic features that are included. It is also possible to do fairly simple focus stacks (landscapes usually), manually. Technique 1 - Using the focus stack feature in Photoshop. The easiest way to get the images into Photoshop in order to stack them is to open the images as layers through either Lightroom or Bridge. This automatically layers all the images into a single file. Since I use Capture One I had to take a slightly longer process. I selected the images, and then clicked on Edit In>Photoshop. Once the separate images were open in Photoshop, I went to Edit>Scripts>Load Files into Stack (I have created an action to speed up this process). A dialogue pops up and you select ‘add open files’ as well as select the ‘attempt to align source images’. 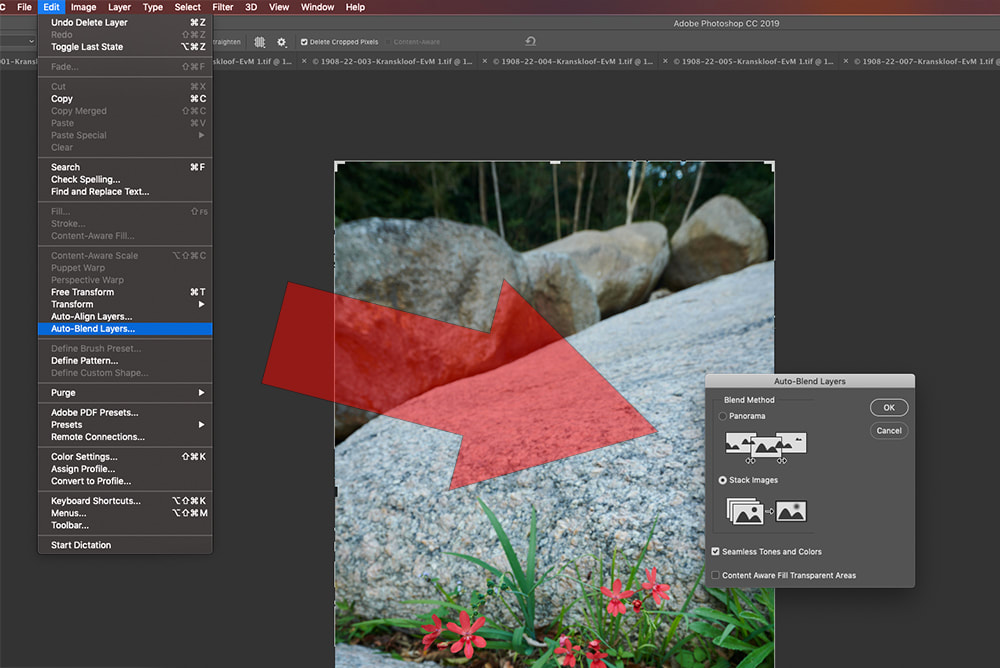 Once all the images are layered together, select all the layers (click on one, go to the end of the stack and shift+click on the last image, or alternatively go to Select>All Layers - you can also use the shortcut Alt/Option+Cmd+A) and then go to Edit>Auto-Blend Layers. Where Photoshop falls apart slightly is when you have some subject movement in the image. Since the programme is looking for sharpness (which it maps through contrast) there is the potential to have some strange artifacting or edges where the movement has confused the blending. In situations like this it makes sense to do a manual blend: Technique 2 - Manually stacking with Photoshop This technique works best when you have relatively few images that you are wanting to stack together. The majority of landscape images can be done using this technique as the depth of field already inherent in a landscape shot at f8 means that you rarely need more than three or four images to create extremely deep depth of field. Start the image in much the same way as the first technique, layering the images and auto-aligning them. Then create a mask on the topmost image in the stack. Zoom in and find where there is a sharpness falloff. Use a relatively hard brush (about 50-60%) and paint where the image is out of focus until it seems to blend with the in focus portion. Continue across the image until you have a ‘line’ on the mask where the edge of the sharpness is. Now click into the mask (Alt+click on the mask) and fill in the rest of the space that would be out of focus with black ink. Once this is complete, go to the next image in the stack and continue the process. 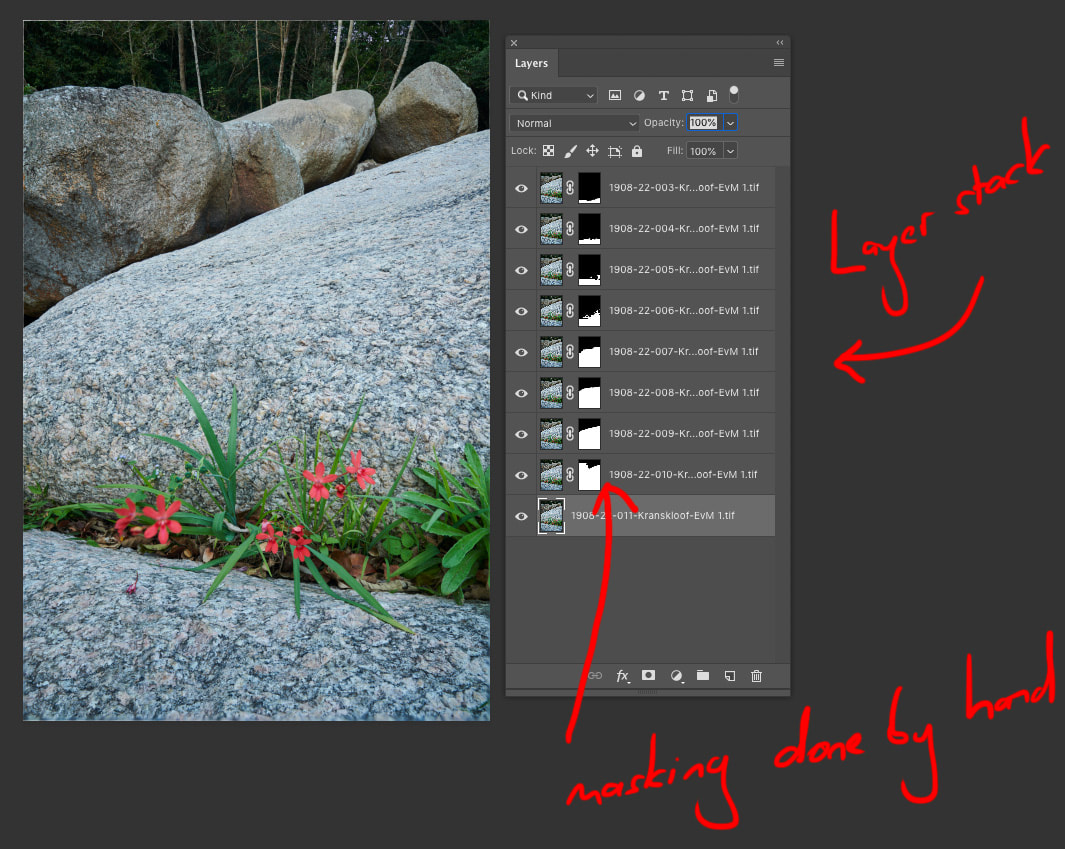 The advantage of this process is that you can select around moving objects, or fine-tune where the mask blends the different layers. The downside is that it can be laborious in terms of time, and can also be difficult to actually create selections around things like flowers and thin branches, particularly if they have swayed in the wind at all (to be fair this will always create problems in blending the final focus stack). Here is a link to a short video created during one of our ‘Composing the Dunes workshops in Namibia that demonstrates manual focus stacking: Technique 3 - Dedicated Software If you plan to do a lot of focus stacking then I highly recommend getting dedicated software to do the job. I personally use one of the venerable first stacking programs; that of Helicon Focus. This software is actually bundled with high-end microscopes that are used by universities and museums. For us mere photographers though, it is possible to purchase the software (yay, something that isn’t rented). If you are a product photographer shooting jewellery this pays for itself very quickly! 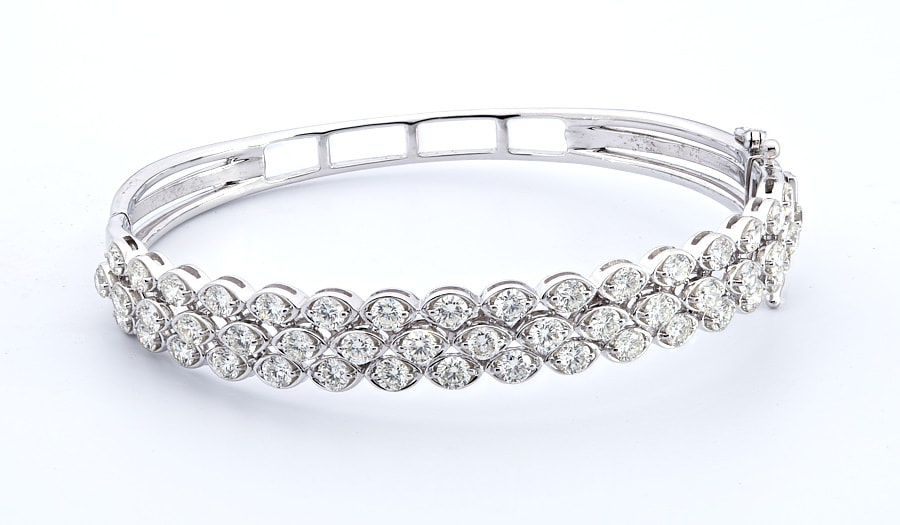 A focus stacked image of 32 layers BEFORE any post-production to clean out blemishes in the metal. This would have been extremely difficult and time consuming without automated software Using either a focus rail or the newer focus stacking feature available on some modern cameras, set shoot several frames at different focus points. Make sure that the camera is set to manual exposure and white balance so that nothing changes apart from the focus between the frames. Once you have imported your photos to the computer launch HeliconFocus. Once launched you can actually click and drag photo sequences onto the application’s ‘stage’ or else open images by clicking Cmd/Ctrl+O or going to File>Open images. HeliconFocus even handles RAW images, but it can be better to start with a set of TIFF files that have already been developed for tonal, luminosity and colour adjustments. I use Photo Mechanic for a lot of my editing chores, and you can select and drag the files directly from Photo Mechanic onto the HeliconFocus stage to easily get started. The images load on the right hand side of the stage with the stage itself occupied by a single image. When you hit ‘Render’, the software creates a contrast map of each image and then attempts to align and blend the stacked images so that the sharpest contrast from each layer is visible. The result, including the auto alignment of the images is extraordinary (as an example the image below of a grasshopper was shot handheld with significant hand movement between frames; the software aligned the images and managed to produce a better depth of field automatically). 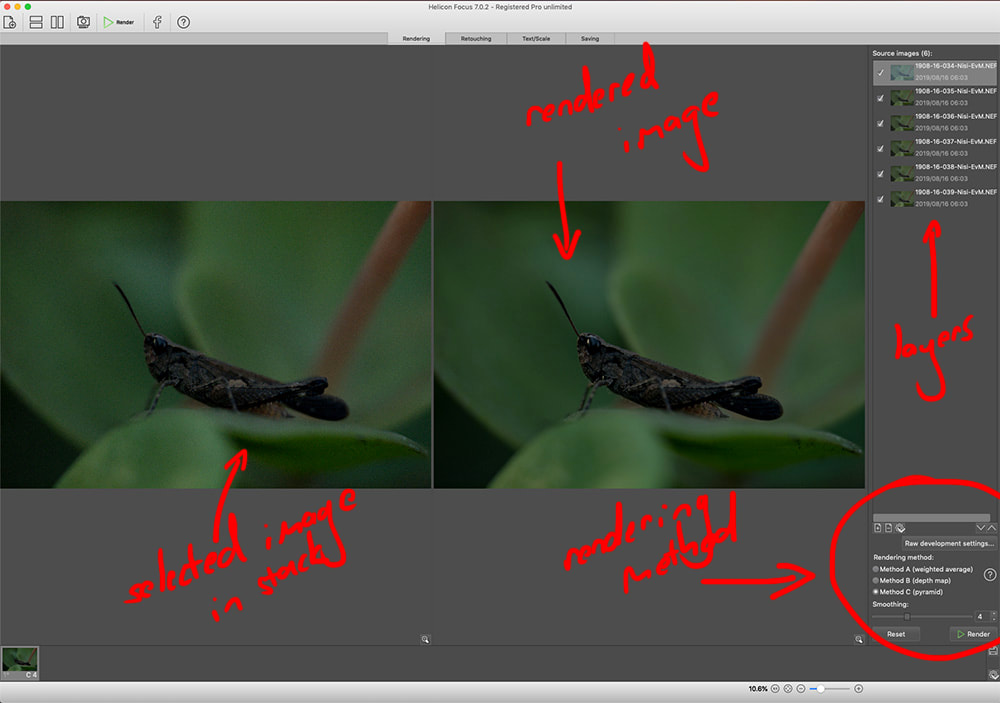 The choice of rendering method is fairly important in this. Here is the description directly from HeliconFocus:
Method A computes the weight for each pixel based on its contrast and then forms the weighted average of all pixels from all source images. This method works better for short stacks and preserves contrast and color. Method B selects the source image containing the sharpest pixel and uses this information to form the "depth map". This method imposes strict requirements on the order of images - it should always be consecutive. Perfectly renders textures on smooth surfaces. Method C uses pyramid approach to image processing dividing image signals into high and low frequencies. Gives good results in complex cases (intersecting objects, deep stacks), though increases contrast and glare. If you get any haloing effects on the edge of your subject you can serenader using a different radius and smoothing setting. The radius effectively broadens the edges of where the blend takes place, while the smoothing feathers that blend. Conclusion As you can see from the above focus stacking isn't particularly complicated for the majority of images. If you are going to be doing a lot focus stacking though, then I would highly recommend getting something like HeliconFocus to assist with the stacking workflow. If you do product photography and are doing small items like jewellery then the software will pay for itself in very little time. However, if you are only shooting landscapes, then manual blends like that done with the very first image of this article are simple to perform, and cost nothing more than the rental/subscription (which I personally hate, but needs must) of Photoshop itself.
2 Comments
10/25/2022 17:20:56
I wish I could write anything close to that. That’s too good! Leave a Reply. |
Nature's Light
|
 RSS Feed
Services |
Company |
|